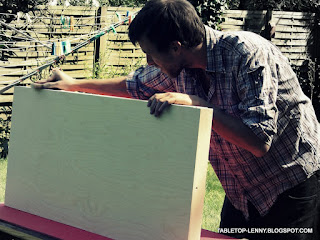
Here you can see a few step by step pictures of building a gaming table that is stable, easy to carry and awesome to play on. First of all we have to set up the circumstances. What size do you need? If you want a terrain surface or a set of terrain build by me we discuss what kind of scenery you are looking for and the dimensions of the whole project.
After setting up where to go the work starts. You can choose a way to seal the surface. For example a clear varnish or a complete painting. If you are looking for something special? Feel free to ask!
Here you can see to examples of surfacing:
Afterwards I can start to construct your table. I use multiplex woods in a high quality that is stable and also not to heavy.
After this work is done it comes to the sanding to get a proper surface for your painting. Sanding is the fitness part of the work and it makes a lot of mess. So I prefer to make it outside:
After sanding with different types of sandpaper you can start the painting which goes over various steps.
Here you can see the black wood parts chilling and drying for their joy. They love to get sealed against any bad influence from dangerous worlds.
Between all those sanding and painting I have time to do the terrain while waiting till the paint has dried.
Here you can see the basic styrodur plates getting prepared to get changed into a little tiny world. I have to rasp the texture before building the terrain surface with filler, PVA and all kind of other materials.
After this work is done I can start to cut in some structures like ponds, stone plates or what ever.
I will continue with this post in a few days and show you the rest of the process of building a handy and stable gaming table. By the way it is not an industrial product. It is a handcrafted idea about a gaming table for miniature wargames. If you are interested? Please get in contact via mail: CLICK
Stay tuned & happy gaming & building!
TT


Keine Kommentare:
Kommentar veröffentlichen